Destiny 2’s first Raid has finally gone live. Titled Leviathan, this latest dungeon series is packed with an assortment of challenging puzzles and boss fights to overcome. To help you get past all of its hurdles, we’ve gathered useful tips to follow as well as what you need to do to access the Leviathan Raid. We’re currently diving straight into the Raid right now, so be sure to check back often as we update this feature with more details on how to beat each individual section.
We’re still digging deep into Destiny 2, but there are some basic things you should know (and habits from Destiny 1 you might need to break). Those include not waiting to decrypt Engrams and saving some of your Upgrade Points. You can check out more in our Destiny 2 beginner’s guide.
For more guides for the game, including breakdowns of the three classes, along with our skill and ability galleries for the various subclasses, be sure to visit our Destiny 2 guides and walkthroughs roundup for more information on what’s happening in the online world of the Guardians.
- How to Access the Raid
- Major Raid Prerequisites
- Suggested Gear
- Leviathan Raid Guide
- Part 1: Embankment
- Part 2: Leviathan Castellum (Part 1)
- Part 3: Royal Pools
- Part 4: Leviathan Castellum (Part 2)
- Part 5: Pleasure Gardens
- Part 6: Leviathan Castellum (Part 3)
- Part 7: The Gauntlet
- Part 8: Emperor Calus
How to Access the Raid
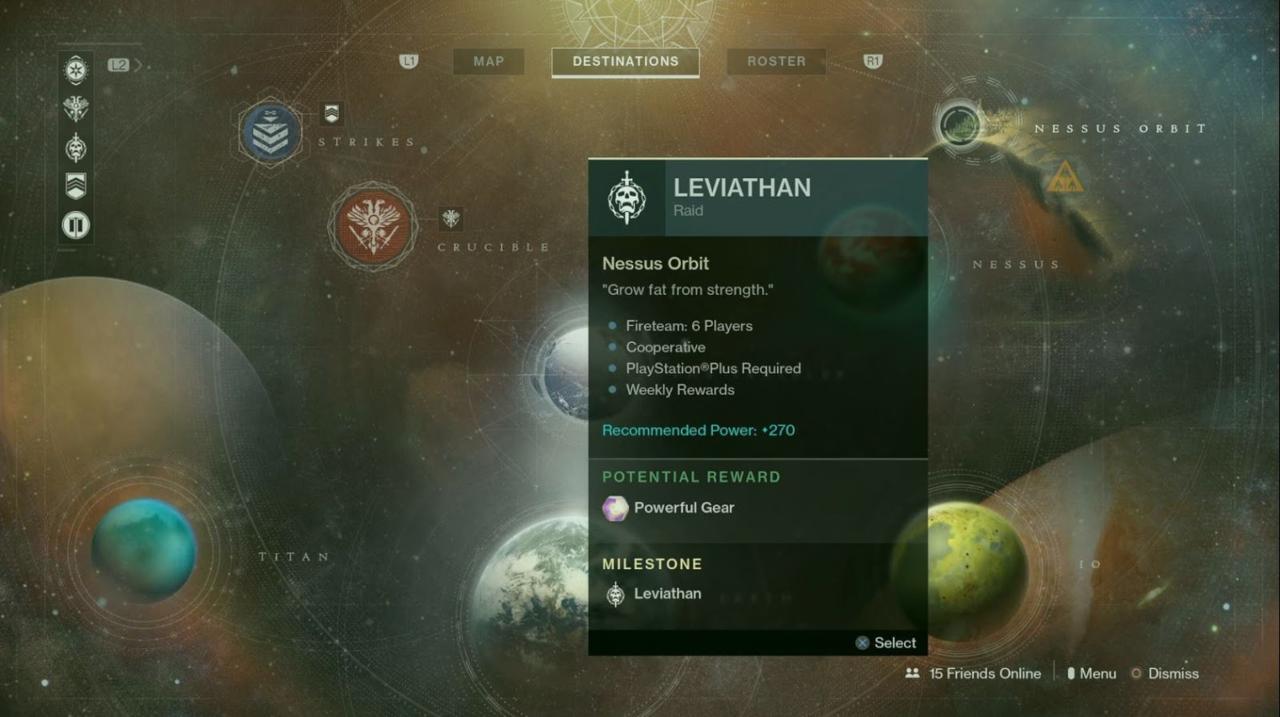
In order to access the Raid, simply select the Leviathan icon in the top right corner of the Director, which you can see in the image below. You’ll also want to initiate a questline called On the Comms, which is unlocked at random after having spent time killing Cabal. Once you complete its major steps, you unlock a new step called Destroyer of Worlds that requires you to complete the Leviathan Raid. Doing so will net you a sweet prize after completing the Raid.
Major Raid Prerequisites
Aside from completing the On the Comms questline, make sure your Power Level is at least 270 before taking on the Leviathan Raid. Going in with anything lower is manageable, but be aware that entering the Raid with a lower Power Level could make you a detriment to your Fireteam. It’s also recommended to enter the Raid with a full fireteam of six players.
Suggested Gear
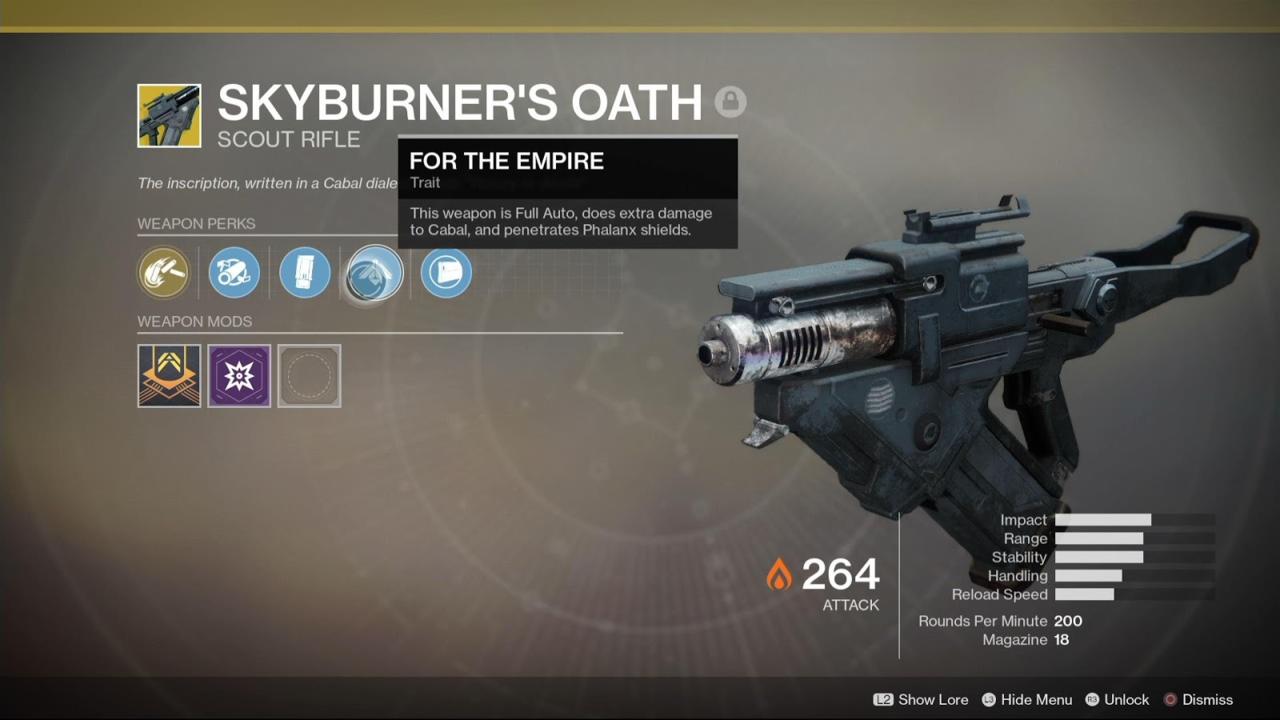
Skyburner’s Oath – The Skyburner’s Oath fires solar slugs that do extra damage to Cabal and penetrates Phalanx shields. This is a handy weapon to use that’ll assist your efforts to take down the loads of Cabal you’ll encounter in the Leviathan Raid.
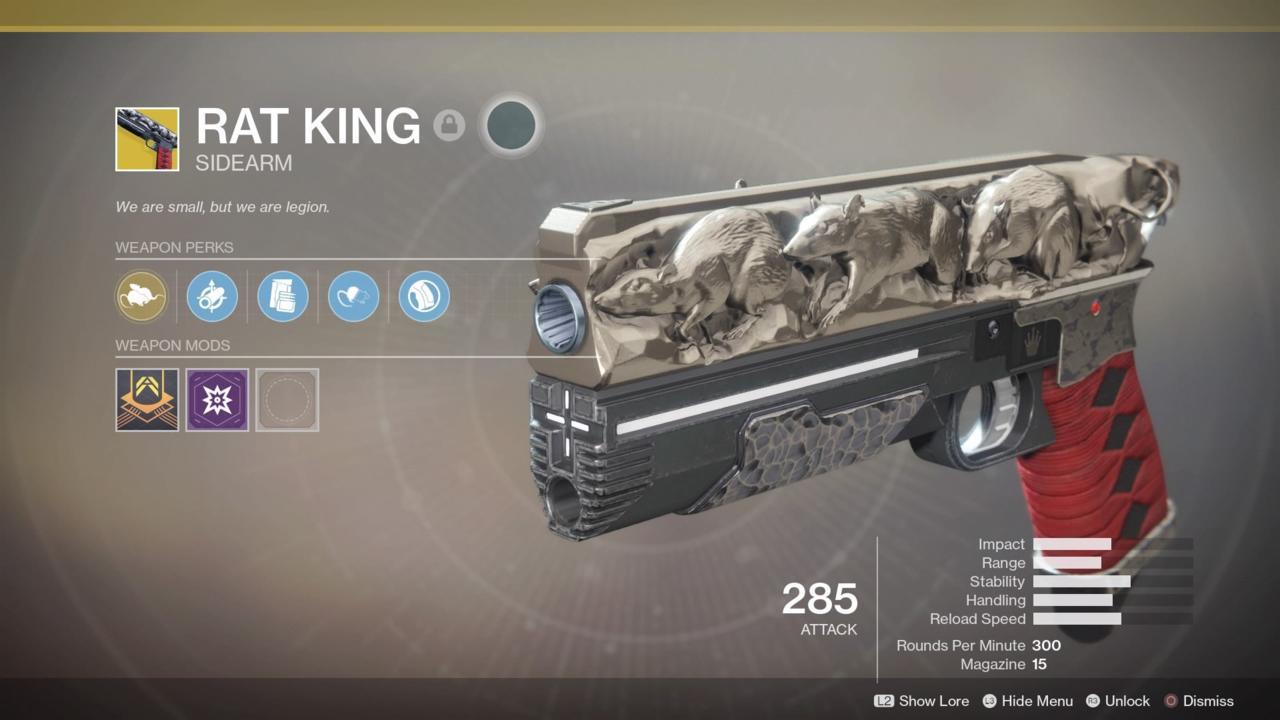
Rat King – The Rat King may seem like an odd choice to bring into the Raid, but it can be a worthwhile asset given it becomes more powerful as more members of your Fireteam have it.
Leviathan Raid Guide
Part 1: Embankment
After starting the Raid, proceed forward until you’ll encounter enemies. These foes won’t harm you unless you shoot them; attack them or run past them. Proceed up the slope and head through the door.
Part 2: Leviathan Castellum (Part 1)
Upon reaching the Castellum, you’ll begin a trial that has you claiming and defending three Standard. To accomplish this, your group should separate into two teams: one to defend the a central point where the Standard are to be taken, and another to retrieve them from their respective bearers. Keep in mind that if the Cabal manage to get too close to the central point, then the trial will restart.
Once all three Standard have been returned, a door will open up the path ahead where you’ll find the first of the Leviathan Raid loot chests, containing a Legendary engram, the Calus’ Selected shader, and the Emperor Calus Tokena Token.
Part 3: Royal Pools
In the next section, you’ll encounter four pressure plates, with a fifth located at the center. Each of these plates has an orb on it that imbues you with a one-minute buff that protects you from environmental damage. Make sure you and your teammates activate this buff before starting the trial, as standing in the water in this area without it will quickly drain your health. Once you’re ready, have four of your teammates stand on each pressure plate.
The premise of the trial is as follows: four people must maintain position on their respective pressure plates to slowly raise a weight up a chain that will expose nine lanterns that you need to destroy. But as you’d expect, powerful enemies spawn, making the process significantly more difficult. As the assault wages on, make sure you and your teammates keep re-activating the buff. Once all the lanterns are destroyed, the trial will end and a loot chest will spawn containing an Emperor Calus Token.
Part 4: Leviathan Castellum (Part 2)
The next section has you once again defending and retrieving three Standards. However, this time around the central point you must defend has switched places with one of the points in the surrounding area. Regardless, utilize the same two-team strategy to complete the trial. After you’ve succeeded, a loot chest will spawn containing glimmer.
Part 5: Pleasure Gardens
The next trial is trickier than the previous two. First, eliminate the enemies you see before heading towards the massive golden statue. Have two of your teammates pick up orbs and charge them at the light beams scattered around the area. An opening should appear beneath the statue; remaining members should then grab the pollen inside. The members up top must then guide pollen holders to special flower scattered around the area. But be careful, there are six Warhounds wandering the area that can make short work of your teammates if spotted. You also have a limited time to get the pollen holders to a flower before a Warhound’s Psionic Howl resets your progress. Regardless, once pollen holders reach a flower, those up top must fire their orbs at the flower to imbue their teammates with a strength buff. Do this two to three times to build up enough power.
Once powered up, the pollen holders should then attack the Warhounds. But if a Warhound sees your teammates, they have one minute seconds to damage them and retreat to the safe room below the golden statue. Rinse and repeat this process until the Warhounds are dead. Keep in mind that you only have three solid chances to defeat all six Warhounds, as the safe room will lock up after the third attempt. You’ll then get Irrigation Key a loot chest will appear on top of the safe room containing random loot and an Emperor Calus Token.
Part 6: Leviathan Castellum (Part 3)
Once again the same principle applies here. Simply utilize the same two-team strategy to obtain the Standards and complete the trial. A loot chest will spawn containing more glimmer.
Part 7: The Gauntlet
To start the trial, jump onto the round platforms to summon enemies. Steadily kill them to fill up the meter under each pillar in the room. Two orbs will eventually spawn; have two of your teammates pick them up. This transports them into tunnels in the surrounding area.
Those in the tunnel need to run through gates with rows of circles on them. Energy barriers close off these uniquely designed gates, so tunnel runners need to quickly call out which gate’s row of circles has a red one. Teammates outside then have a limited time to shoot at the rows of glowing triangles on the corresponding gate that doesn’t contain a red circle. Successfully doing this will open up the gate, clearing the path for the tunnel runners. The two tunnel runners converge and throw their orbs into an energy fountain.
Once you have completed this three games, your entire team can go to the middle and grab an orb and run through the tunnels. After the entire team throws their orbs into the energy fountain, the trial will end.
Part 8: Emperor Calus
After clearing the third Castellum challenge, you’ll be led to Emperor Calus’ throne room. To initiate the battle, shoot the cup from his hand, and he’ll start spawning enemies into the room for you to fight. Eventually, Calus will teleport three players into a purple dimension to do battle with a giant projection of his head, while the other three will be left to defend themselves in the throne room. Four Psions then spawn in the throne room each with a symbol floating above them–make sure your teammates don’t kill them.
Those transported inside the purple dimension will each notice a different symbol on the Calus projection’s forehead. Each player needs to shout out the symbol they see to their teammates in the throne room. The players back in the real world must then kill the Psion aligned with the symbol that wasn’t called out. This lowers the barrier surrounding the Calus projection’s head.
The Calus projection will then begin to spew skull projectiles. When this barrage is over, orbs will spawn that can take the players back into the throne room. At this point, everyone should climb on whichever platform is glowing in the throne room in order to receive the Force of Will buff. Fire at Calus until he becomes invincible, and then move to the next glowing platform to shoot at him again. Make sure to avoid his attacks during this portion of the fight; it can instantly wipe out your team. Rinse and repeat this process until he goes down.